
The below instructions are for Outlook 2013 only, in case you have any issues or need help with archiving your emails on a different version of outlook please contact IT at support@mmsholdings.com or via https://support.mmsholdings.com
- By default, Outlook 2013 does not have an Archive file, one must be created manually.
- Once the archive file has been created, you can use the same file to archive email periodically.
- Make sure you have cleaned up your mailbox:
- The “Deleted Items: and “Junk E-Mail” folders should be empty before archiving.
- Delete any unwanted emails which may take up space
Below are the steps to perform create an archive file and archive emails in outlook 2013:
- Open Outlook.
- Select: File > Info > Cleanup Tools.
- Click on Archive in the dropdown box.
- In the window that opens you can change the settings to Archive:

- All your folders and subfolders.
- A single folder and all its subfolders.
- Set Outlook to Archive everything before a specified date.
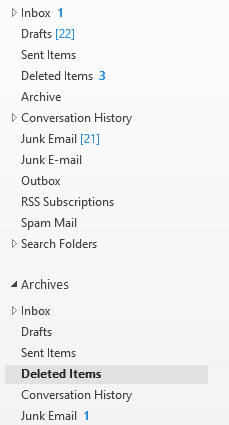
For e.g. if you want to archive your entire mailbox, you select your email-id just above the inbox folder in the above screenshot and also the option “Archive this folder and all subfolders”
5. Click OK and the Archive file will be created and attached to Outlook.
6. The Archive process will then run using the settings you previously entered.
- All emails received before the date you selected will be moved to the Archive file. If the email being Archived is in a folder named John Doe, it will be stored in a folder named John Doe in the Archive file. If a folder does not have an email old enough to be Archived, the folder will not be created in the Archive file until it does.
Note: To see if the Archive process is running, look at the lower right-hand corner of the Outlook screen.

7. Please follow steps 1-5 to archive your emails periodically, and make sure you are selecting the same archive file in step 4 window by hitting browse, this will avoid creation of additional archival files and confusion.
0 Comments